


Debugging in CSS means figuring out what might be the problem when you have unexpected layout results.
Debugging CSS can be a hair-pulling experience, but fear not my web development comrades! We have some tricks up our sleeves to make the process smoother than a freshly paved highway.
CSS is an essential part of web development, but it can also be a source of frustration when things don't look the way you expect. Fortunately, there are several tools and techniques that you can use to debug CSS and find and fix issues.
Every other programming language is easy or has a way of debugging, especially from the editor or IDE part. e.g. JavaScript has a browser and terminal console.log and a debugger. There are also handy extensions, tools, logs, etc in different programming languages, so I was thinking, about what really goes on in the CSS world.
Some of the most common methods for debugging CSS include using browser developer tools, CSS source maps, CSS resets, adding comments, and printing values. Let's ingest each of these:
Browser Developer Tools
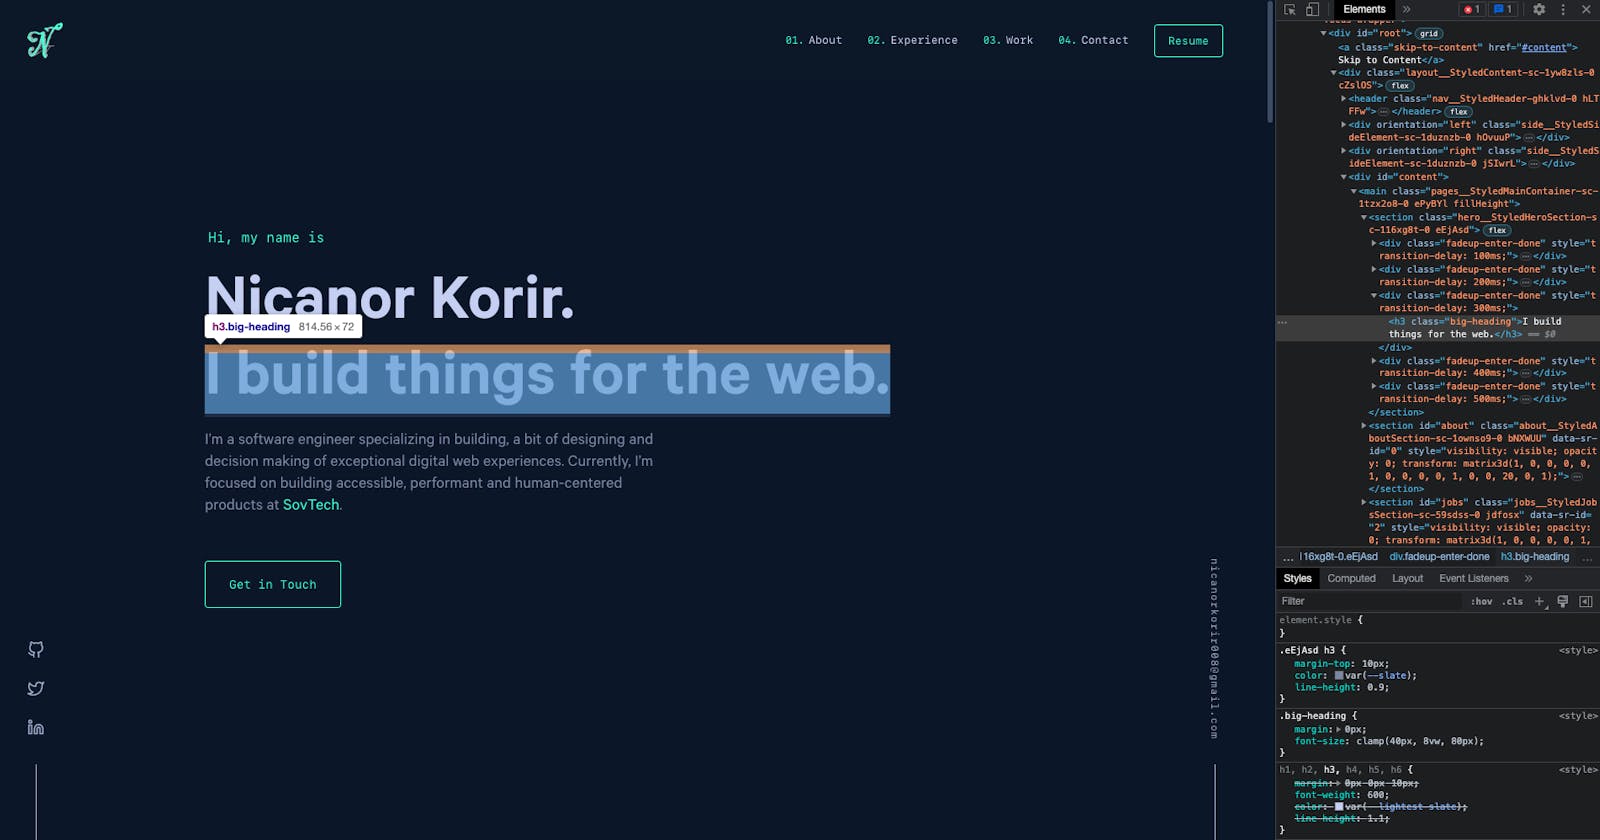
The most common way to debug CSS is to use the built-in developer tools in the web browser. Most modern browsers have a set of tools that allow you to inspect the HTML and CSS of a web page, including Google Chrome, Mozilla Firefox, Apple Safari, and Microsoft Edge. These tools give you the ability to view and edit styles, see which styles are being applied to an element, and determine why a particular style isn't having the desired effect.
Think of it as a surgeon's scalpel - precise, powerful, and not for the faint of heart.
To use the developer tools, right-click on the element you want to inspect and select "Inspect Element" or press F12. The dev tools will open, and you can see the HTML and CSS for the page. You can also use the "Elements" tab to see the structure of the page and the "Styles" tab to see which styles are being applied to an element.
FYI: the most commonly used are color: red or background: red, not sure why but I guess coz red is shouting.
For example, if you want to change the background color of a button on a webpage, you can do the following:
<button class="my-button">Click Me!</button>
.my-button {
  background-color: blue;
}
Right-click on the button in the browser, select "Inspect Element", and then click on the "Styles" tab in the developer tools. Find the .my-button selector and click on the background-color property. You can then change the value to a different color, like red.
CSS Source Maps
If you're using a CSS preprocessor like Sass, Less, or Stylus, you can use CSS source maps to debug your compiled CSS. It's like using a time machine to go back to the preprocessed code and make changes, without altering the compiled CSS. Talk about a developer's dream come true! Source maps allow you to see the original preprocessor code in the browser's dev tools, making it easier to debug the source of any issues.
When you use a preprocessor, it compiles your code into CSS, but the compiled code can be difficult to read and understand. With source maps, you can see the original preprocessor code in the browser's dev tools, making it easier to find and fix any issues.
To use source maps, you'll need to set them up in your build process. The exact steps will vary depending on the preprocessor you're using and your build process, but most preprocessors have documentation on how to set up source maps.
How to use CSS source maps
Source maps can be used with any tool or language that compiles to CSS, not just Sass. Here are some examples:
LESS: The LESS compiler has a
--source-mapoption that you can use to generate source maps. For example:lessc --source-map my-styles.less my-styles.cssPostCSS: PostCSS has a plugin called
postcss-sourcemapsthat can generate source maps. You can add it to your PostCSS configuration like this:const postcss = require('postcss'); const sourcemaps = require('postcss-sourcemaps'); const result = postcss() .use(sourcemaps()) .process(css, { from: 'src/styles.css', to: 'dist/styles.css' }); console.log(result.css); // Compiled CSS console.log(result.map); // Source mapStylus: The Stylus compiler has a
source mapan option that you can use to generate source maps. For example:stylus --sourcemap my-styles.styl
Note that the exact method for generating source maps may differ depending on the tool or language you are using. Check the documentation for your specific tool or language to learn how to generate source maps. Once you have generated a source map, you can use it in your browser's developer tools to debug your CSS.
How to use CSS Source Maps with Sass
Here's an example of using CSS source maps to debug compiled Sass code in Google Chrome:
- First, make sure that your Sass compiler is set up to generate source maps. In this example, we're using the command-line tool
sasswith the--source-mapoption:
sass input.scss output.css --source-map
This will compile input.scss to output.css and generate a source map file.
Next, open your web page in Google Chrome and open the developer tools by right-clicking on the page and selecting "Inspect" or pressing
Ctrl+Shift+I.In the developer tools, open the "Sources" panel and navigate to the CSS file you want to debug. You should see a section labeled "Source Map" in the right-hand sidebar.
If the source map is enabled and properly linked to the compiled CSS file, you should be able to see the original Sass code in the "Sources" panel. You can set breakpoints, step through the code, and inspect variables and expressions just as you would with regular JavaScript debugging.
When you make changes to your Sass code and recompile, the changes should be reflected in the dev tools automatically, making it easier to see the effect of your changes in real time.
Using source maps can save you a lot of time and frustration when debugging compiled CSS code, especially if you're working with a large and complex codebase.
CSS Resets
If your layout is not displaying as expected, you can try using a CSS reset to remove the default styling provided by the browser. This can help you isolate and debug any issues with your custom styles. A CSS reset is a set of styles that are applied to all elements on a page, to provide a consistent starting point for styling. By using a reset, you can ensure that all elements have a consistent default style, making it easier to see what's causing any layout issues.
There are several popular CSS resets available, including Normalize.css and Eric Meyer's Reset. You can use a reset by including the reset styles in your CSS file or by importing it from a CDN.
Another option is to use CSS unset . The all property in CSS resets all of the selected element’s properties, except the direction and unicode-bidi properties that control text direction.
.module {
  all: unset;
}
When in doubt, use a CSS reset to wipe the slate clean and start fresh. It's like hitting the reset button on your computer - all the default styles are gone, and you can focus on the custom styles.
Adding comments
Adding comments to your CSS code can help you understand what each section of your stylesheet is doing and make it easier to debug any issues. Comments are ignored by the browser, but they can be a helpful tool for you and other developers who are working on the code. You can add a comment in CSS by using the /* */ syntax, like this:
/* This is a comment */
By adding comments to your code, you can make it easier to understand what each section of your stylesheet is doing and make it easier to find and fix any issues.
Printing values
Finally, you can use the CSS content. This is a CSS content property to debug CSS in a creative way to solve styling issues. It allows you to add text or images to the page, which can help you identify which elements are affected by a particular style rule.
Not only does content allow you to insert text or other content into your web page, it can also be a useful tool for debugging CSS. By setting the content property of an element to a specific value, you can easily determine if that style is being applied correctly.
For example, you could set the content property of a pseudo-element like ::before or ::after to display the value of a specific property. Imagine adding a witty message like "Uh-oh, looks like you forgot to set the display property!" when the display property is missing.
Here's an example of how you could use the content property to debug CSS:
my-element::before {
  content: "Width is: " width;
}
Here is a real example:
button:not(:disabled)::before {
  content: "Click me!";
}
This code will add the text "Click me!" before any enabled button element that doesn't have the disabled attribute. You could use this to help identify which buttons are clickable, or to make sure that certain buttons are properly enabled.